 serein
 ![[VoxCity] 使用Google Cloud & GEE API下载数据(踩坑记录)](/_astro/banner.BkgY1nL2_Z1rSBmo.webp)
Introduction
最近干起了跟GIS相关的任务,正好前段时间Filip Biljecki来学校开了个讲座,发现他做的东西还是蛮有意思的。之前虽然看过他几篇文章,但是通过这次讲座才知道他还有那么多别的方向的paper。于是在讲座后,我去读了下他的一些文章,发现有一篇文章 VoxCity: A Seamless Framework for Open Geospatial Data Integration, Grid-Based Semantic 3D City Model Generation, and Urban Environment Simulation 做的东西非常有趣,且里面做的东西我是用得上的。于是我按照 VoxCity github 配置了环境,试着跑了代码。但是过程中还是遇到了不少问题的,因此写个博客记录一下。
Setup for Earth Engine
对于本地的环境部署,仅需要参考README中的Installation部分进行配置即可,基本不会存在什么问题。在完成了环境的配置后,就需要对Earth Engine的环境进行配置了。
git clone https://github.com/kunifujiwara/VoxCity.gitconda create --name voxcity python=3.12conda activate voxcityconda install -c conda-forge gdalpip install voxcity1. Download gcloud package
在我按照环境配置后,我运行脚本发现出现了以下报错:
Exception: gcloud command not found. Please ensure that gcloud is installed.More information: https://developers.google.com/earth-engine/guides/auth这意味着经过上面的环境配置,并没有配置好 gcloud 的环境。因此,需要去 gcloud CLI安装指南 按照对应的步骤进行 gcloud 的安装。
2. Authenticate and initialize Earth Engine
在完成了 gcloud 的配置后,接下来就可以在命令行部分运行 earthengine authenticate,按照命令行的提示进行 Earth Engine的 authenticate 即可。在完成配置后,可以在命令行再一次输入 earthengine authenticate,如果得到 Authenticate: Credentials already exist. Use --force to refresh. 的输出说明已经正确配置成功了。
3. Register Cloud project
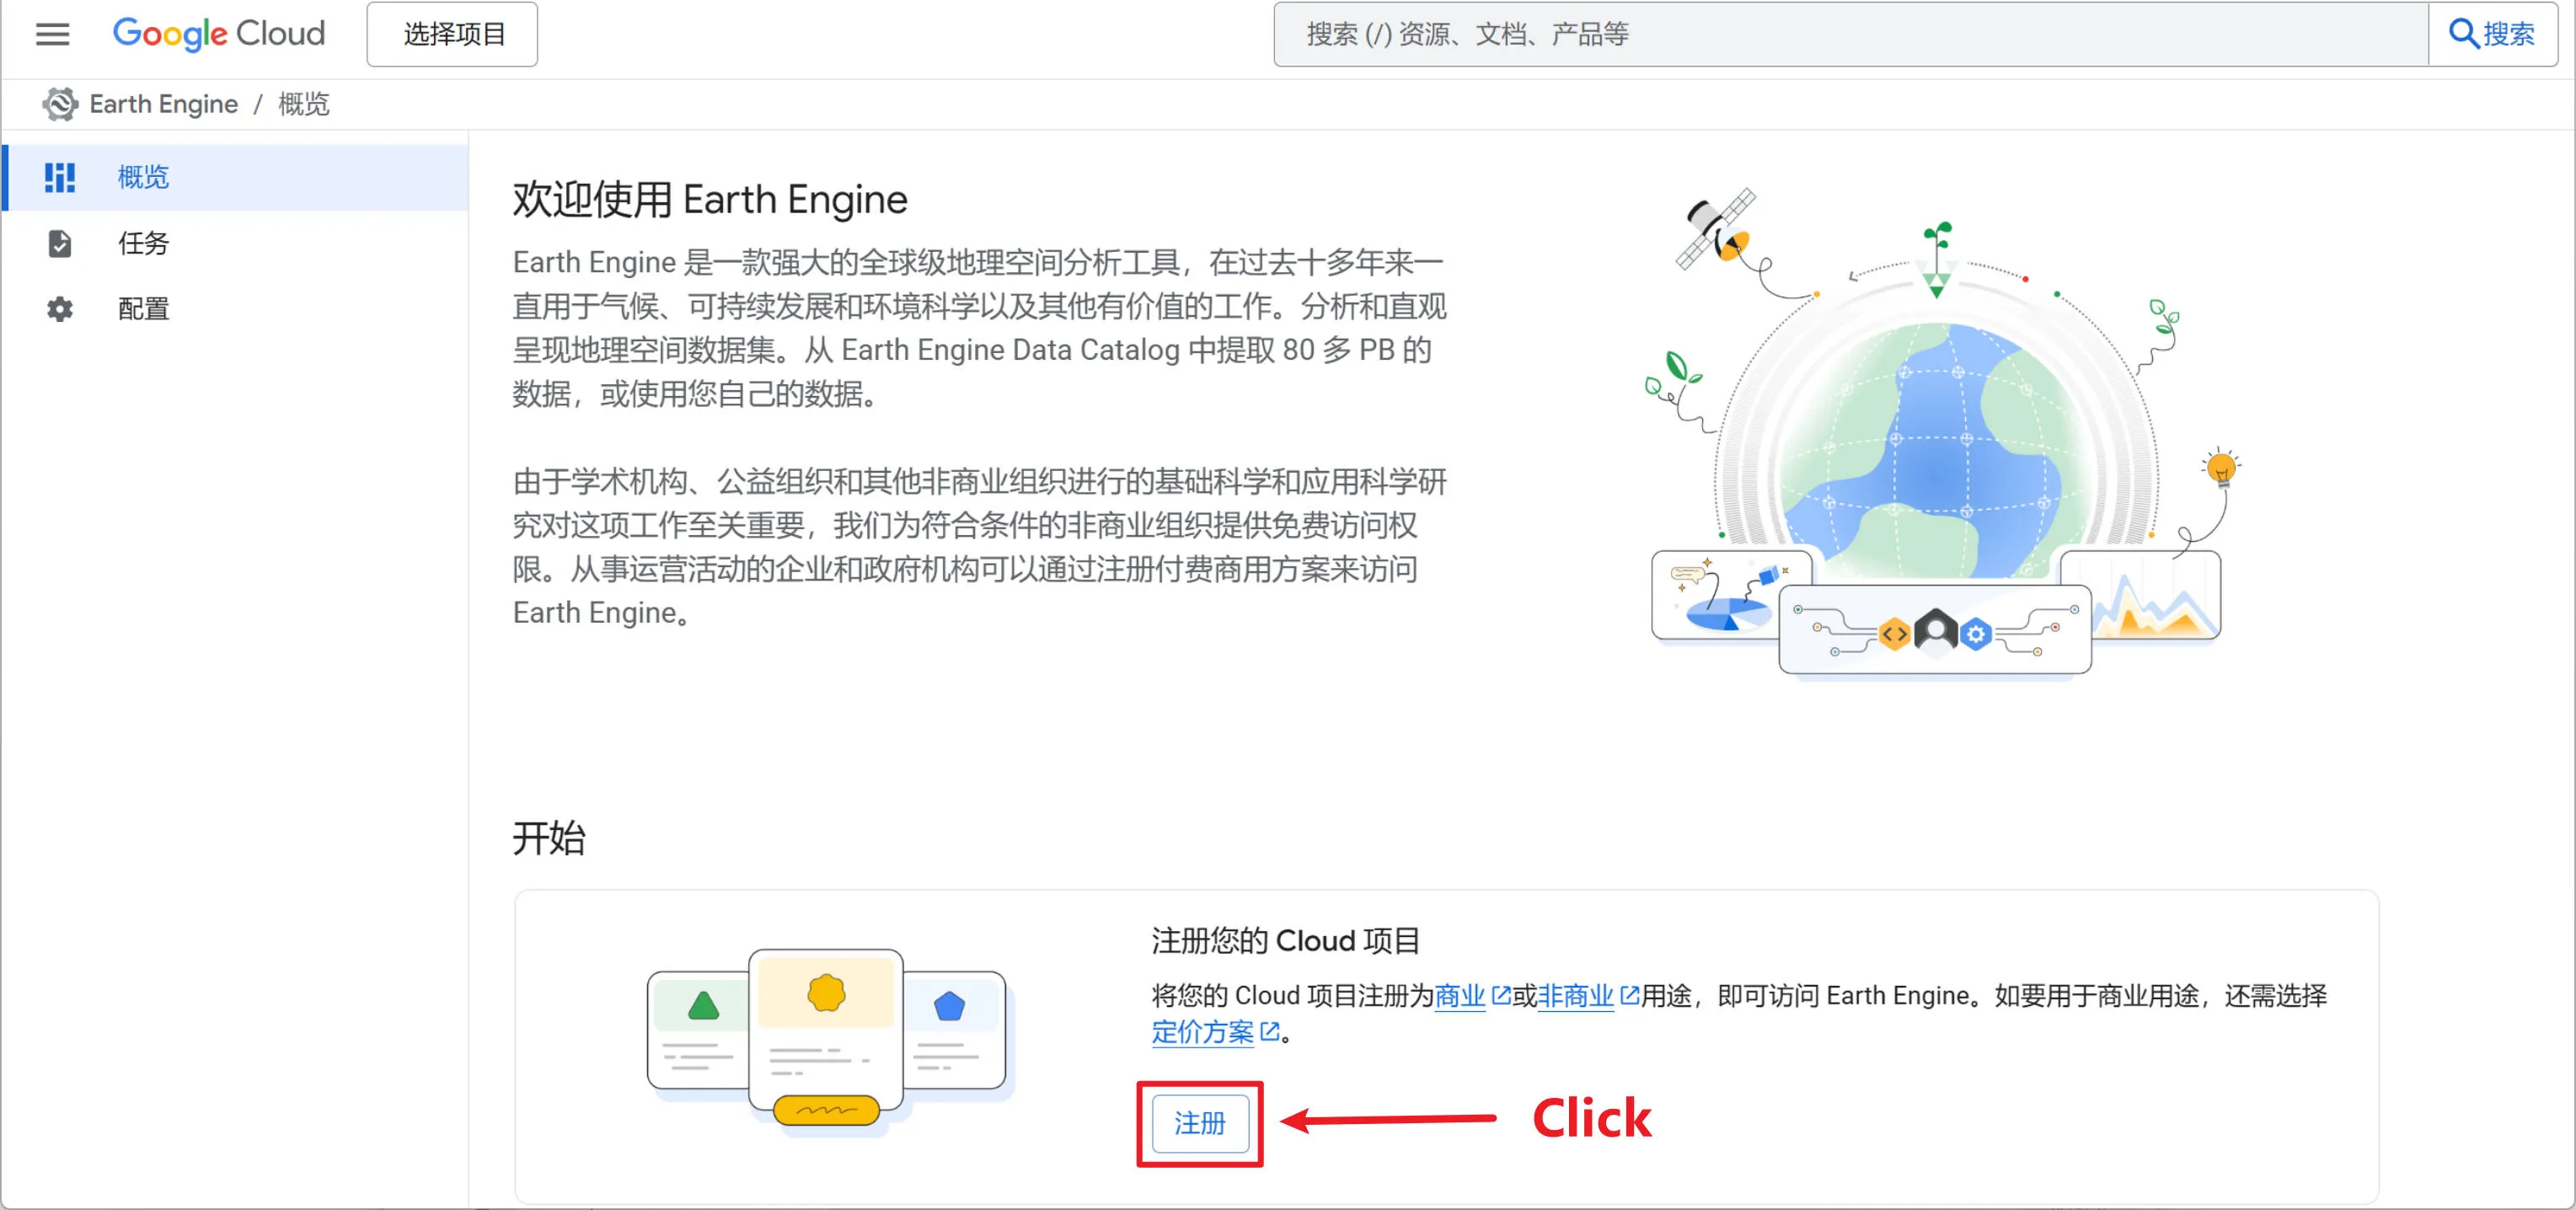
在注册Cloud项目前,最好有一个Google的账号,便可以直接进行登录。在登录后,前往 Cloud 注册页面 ,在概览部分点击注册按钮进行Cloud项目的注册。
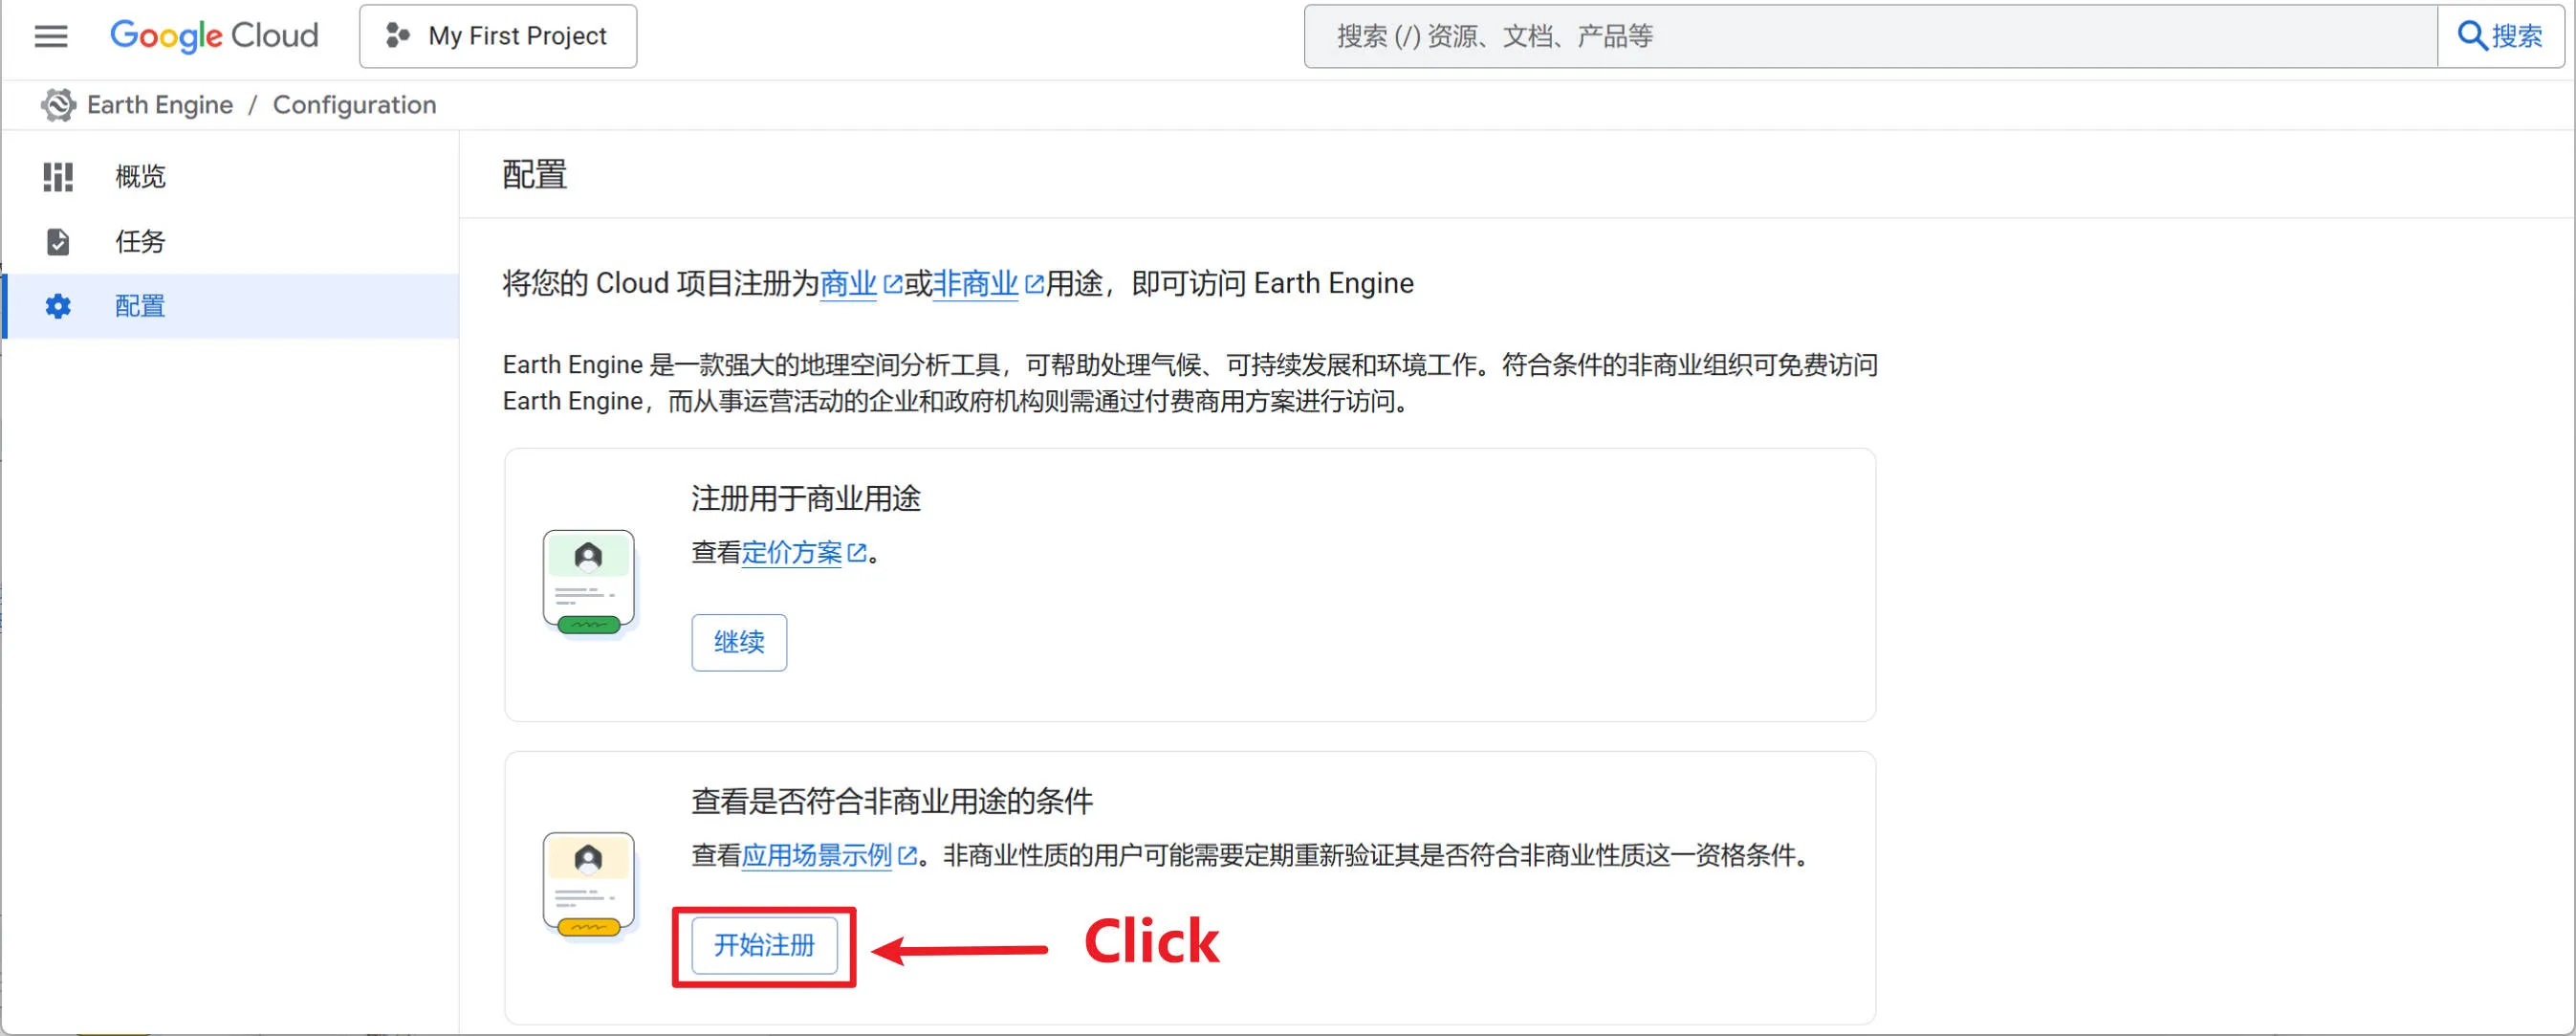
点击后会进入到配置界面,根据需要选择对应的用途。这里由于本人是学生,因此我选择了非商业用途,后续只需要根据要求依次填写对应的信息即可。
4. Create new project
在完成后即可在 IAM 部分选择新建一个新的项目,这里我创建了名为 voxcity 的project。同时,需要保证在本地配置的用户信息在该项目中有权限进行访问(在IAM的对应project页面可以对用户访问权限进行控制)。
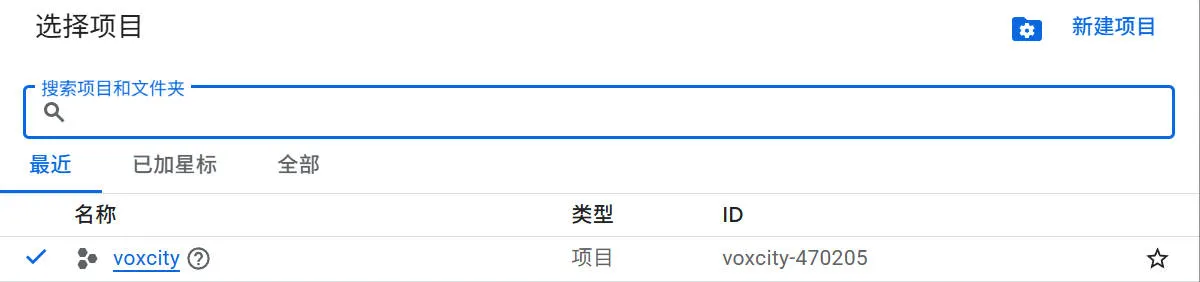
此处的project将作为下面的Initialize的参数。
import eeee.Authenticate()ee.Initialize(project='your-project-id')需要注意的是,此处project应该填写的是 ID 部分的信息,即 voxcity-470205,而非 voxcity。否则可能出现以下的报错:
ee.ee_exception.EEException: Caller does not have required permission to use project voxcity. Grant the caller the roles/serviceusage.serviceUsageConsumer role, or a custom role with the serviceusage.services.use permission, by visiting https://console.developers.google.com/iam-admin/iam/project?project=voxcity and then retry. Propagation of the new permission may take a few minutes.此外,为了能够通过 Cloud project 使用 GEE API,需要去 GEE API页面 确保新建project的GEE API进行了正确的配置,否则在使用的过程中可能会出现API接口无法访问的情况。
5. Download data from GEE
如果上面的过程均正常完成,那么便可以通过GEE API进行数据下载了。以VoxCity的代码为例,在运行get_voxcity()函数时,会进行数据的下载。
voxcity_grid, building_height_grid, building_min_height_grid, building_id_grid, canopy_height_grid, canopy_bottom_height_grid, land_cover_grid, dem_grid, building_gdf = get_voxcity( rectangle_vertices, building_source, land_cover_source, canopy_height_source, dem_source, meshsize, **kwargs)在数据下载的过程中,可能会出现下面的几个报错:
# Error 1...googleapiclient.errors.HttpError: <HttpError 404 when requesting https://earthengine.googleapis.com/v1/projects/voxcity-470205:listAssets?alt=json returned "Asset "projects/voxcity-470205/assets" not found.". Details: "Asset "projects/voxcity-470205/assets" not found.">
# Error 2...ee.ee_exception.EEException: Asset "projects/voxcity-470205/assets" not found.
# Error 3ee.ee_exception.EEException: ee.Initialize: no project found. Call with project= or see http://goo.gle/ee-auth.
起初我并没有太理解为什么会出现这些报错,我以为是project权限的问题导致对应的assets文件夹无法进行访问。经过排查,最终发现,问题出在 GEE平台 上。由于起初并没有添加创建的 voxcity-470205 project 到 cloud assets 中,导致了上面的报错。
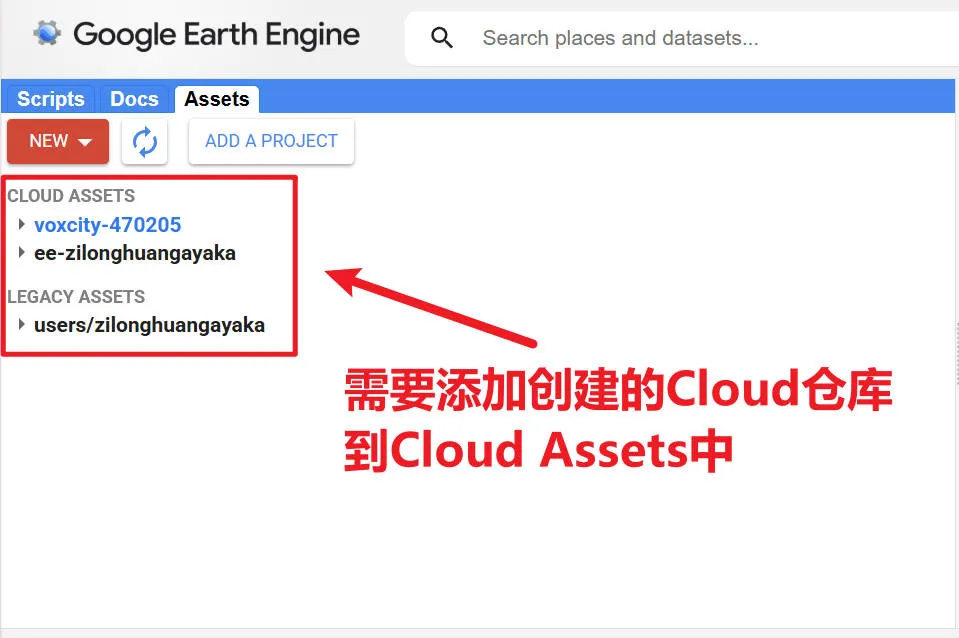
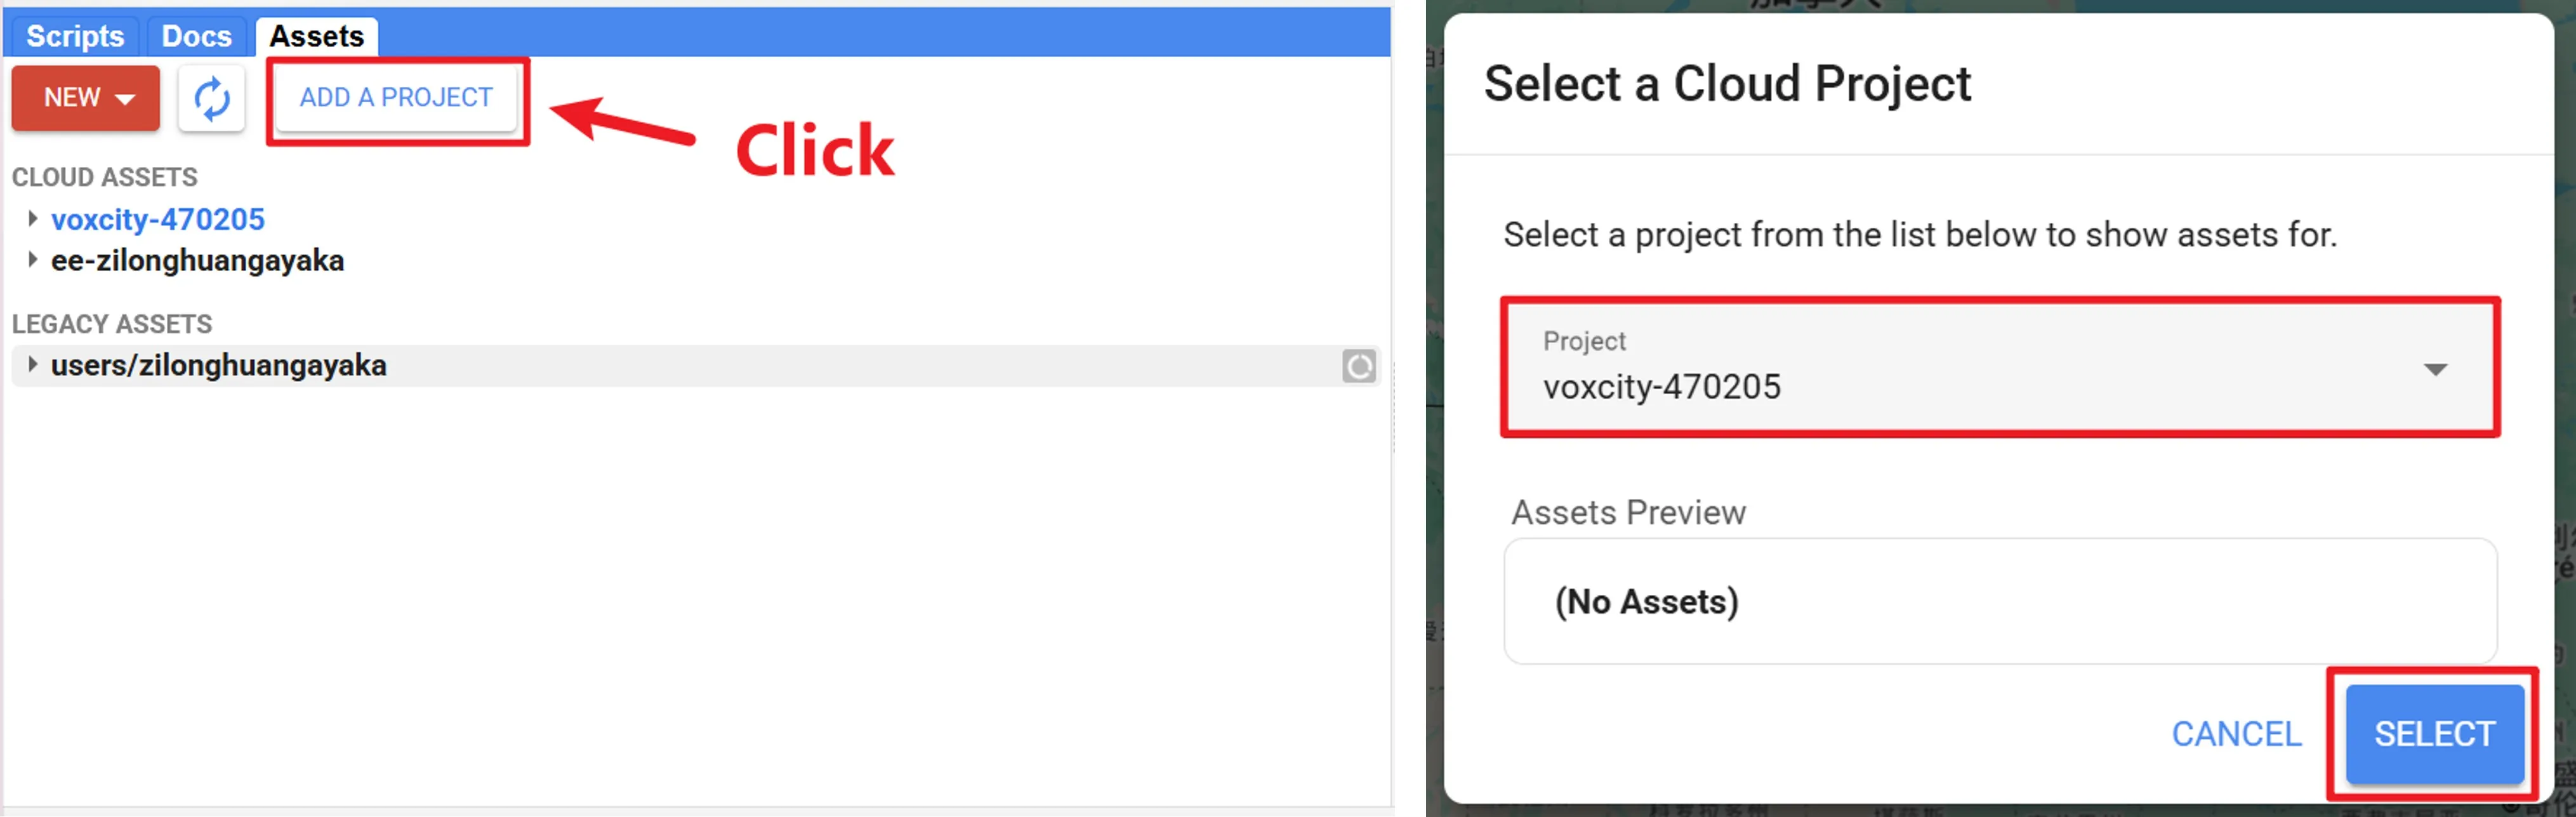
因此,为了添加 voxcity-470205 project 到 cloud assets中,仅需要点击 ADD A PROJECT 按钮,选择你需要添加的 Project 名称,最后点击 Select 即可完成正确的添加。这样就可以正常通过GEE API进行数据下载了。
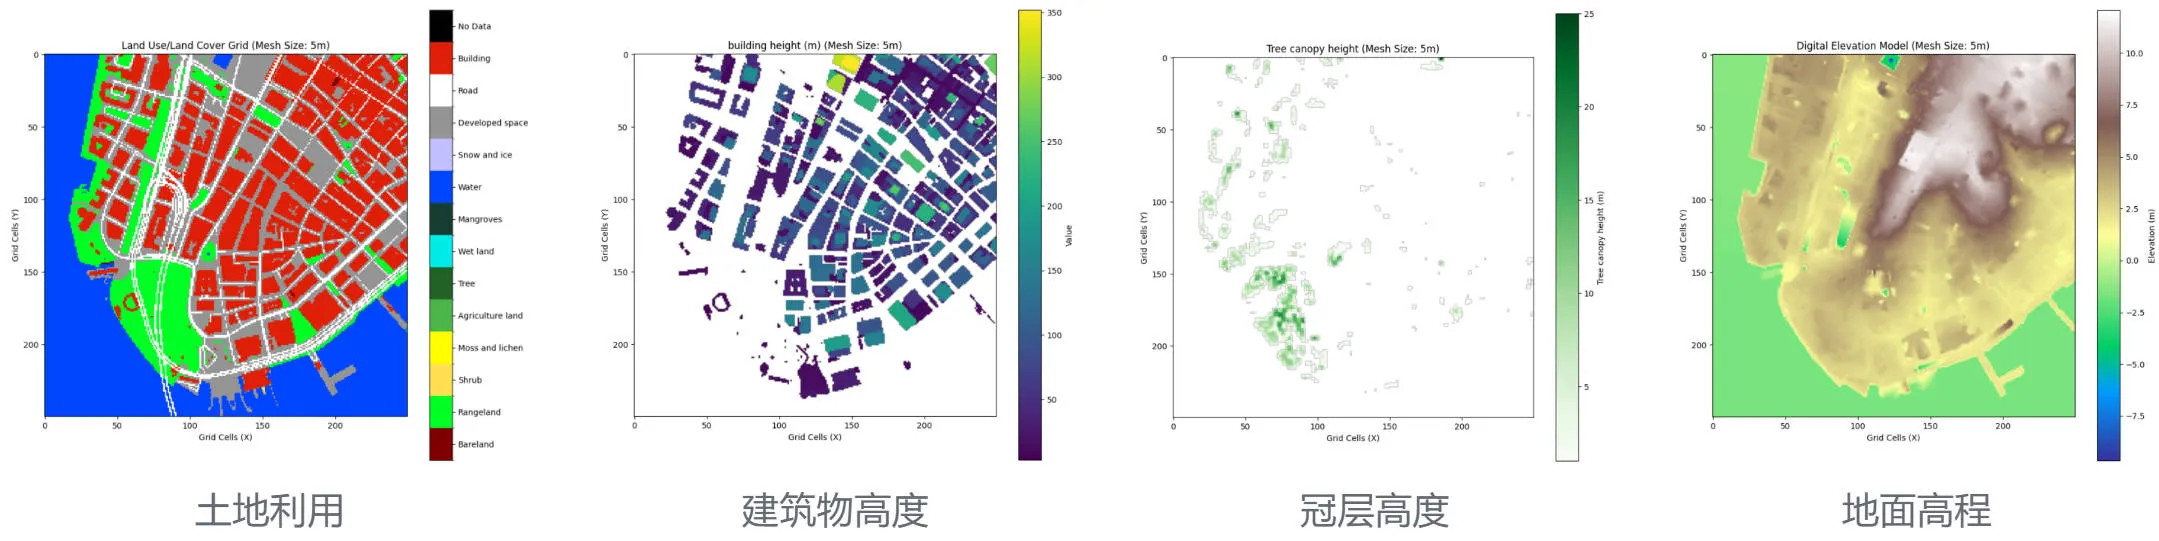
下面是我运行VoxCity给的case区域下载得到的数据:
Afterword
GEE确实是一个非常不错的平台,做遥感类型的任务掌握GEE还是蛮重要的。之前对GEE的使用实在太少,使用仅限于在GEE Web平台上下载遥感影像数据。还是得好好学习一下,感觉还是非常有用的。